Step-by-Step Instructions
- Navigate to Readers in the PassEntry Dashboard and click Add reader.
-
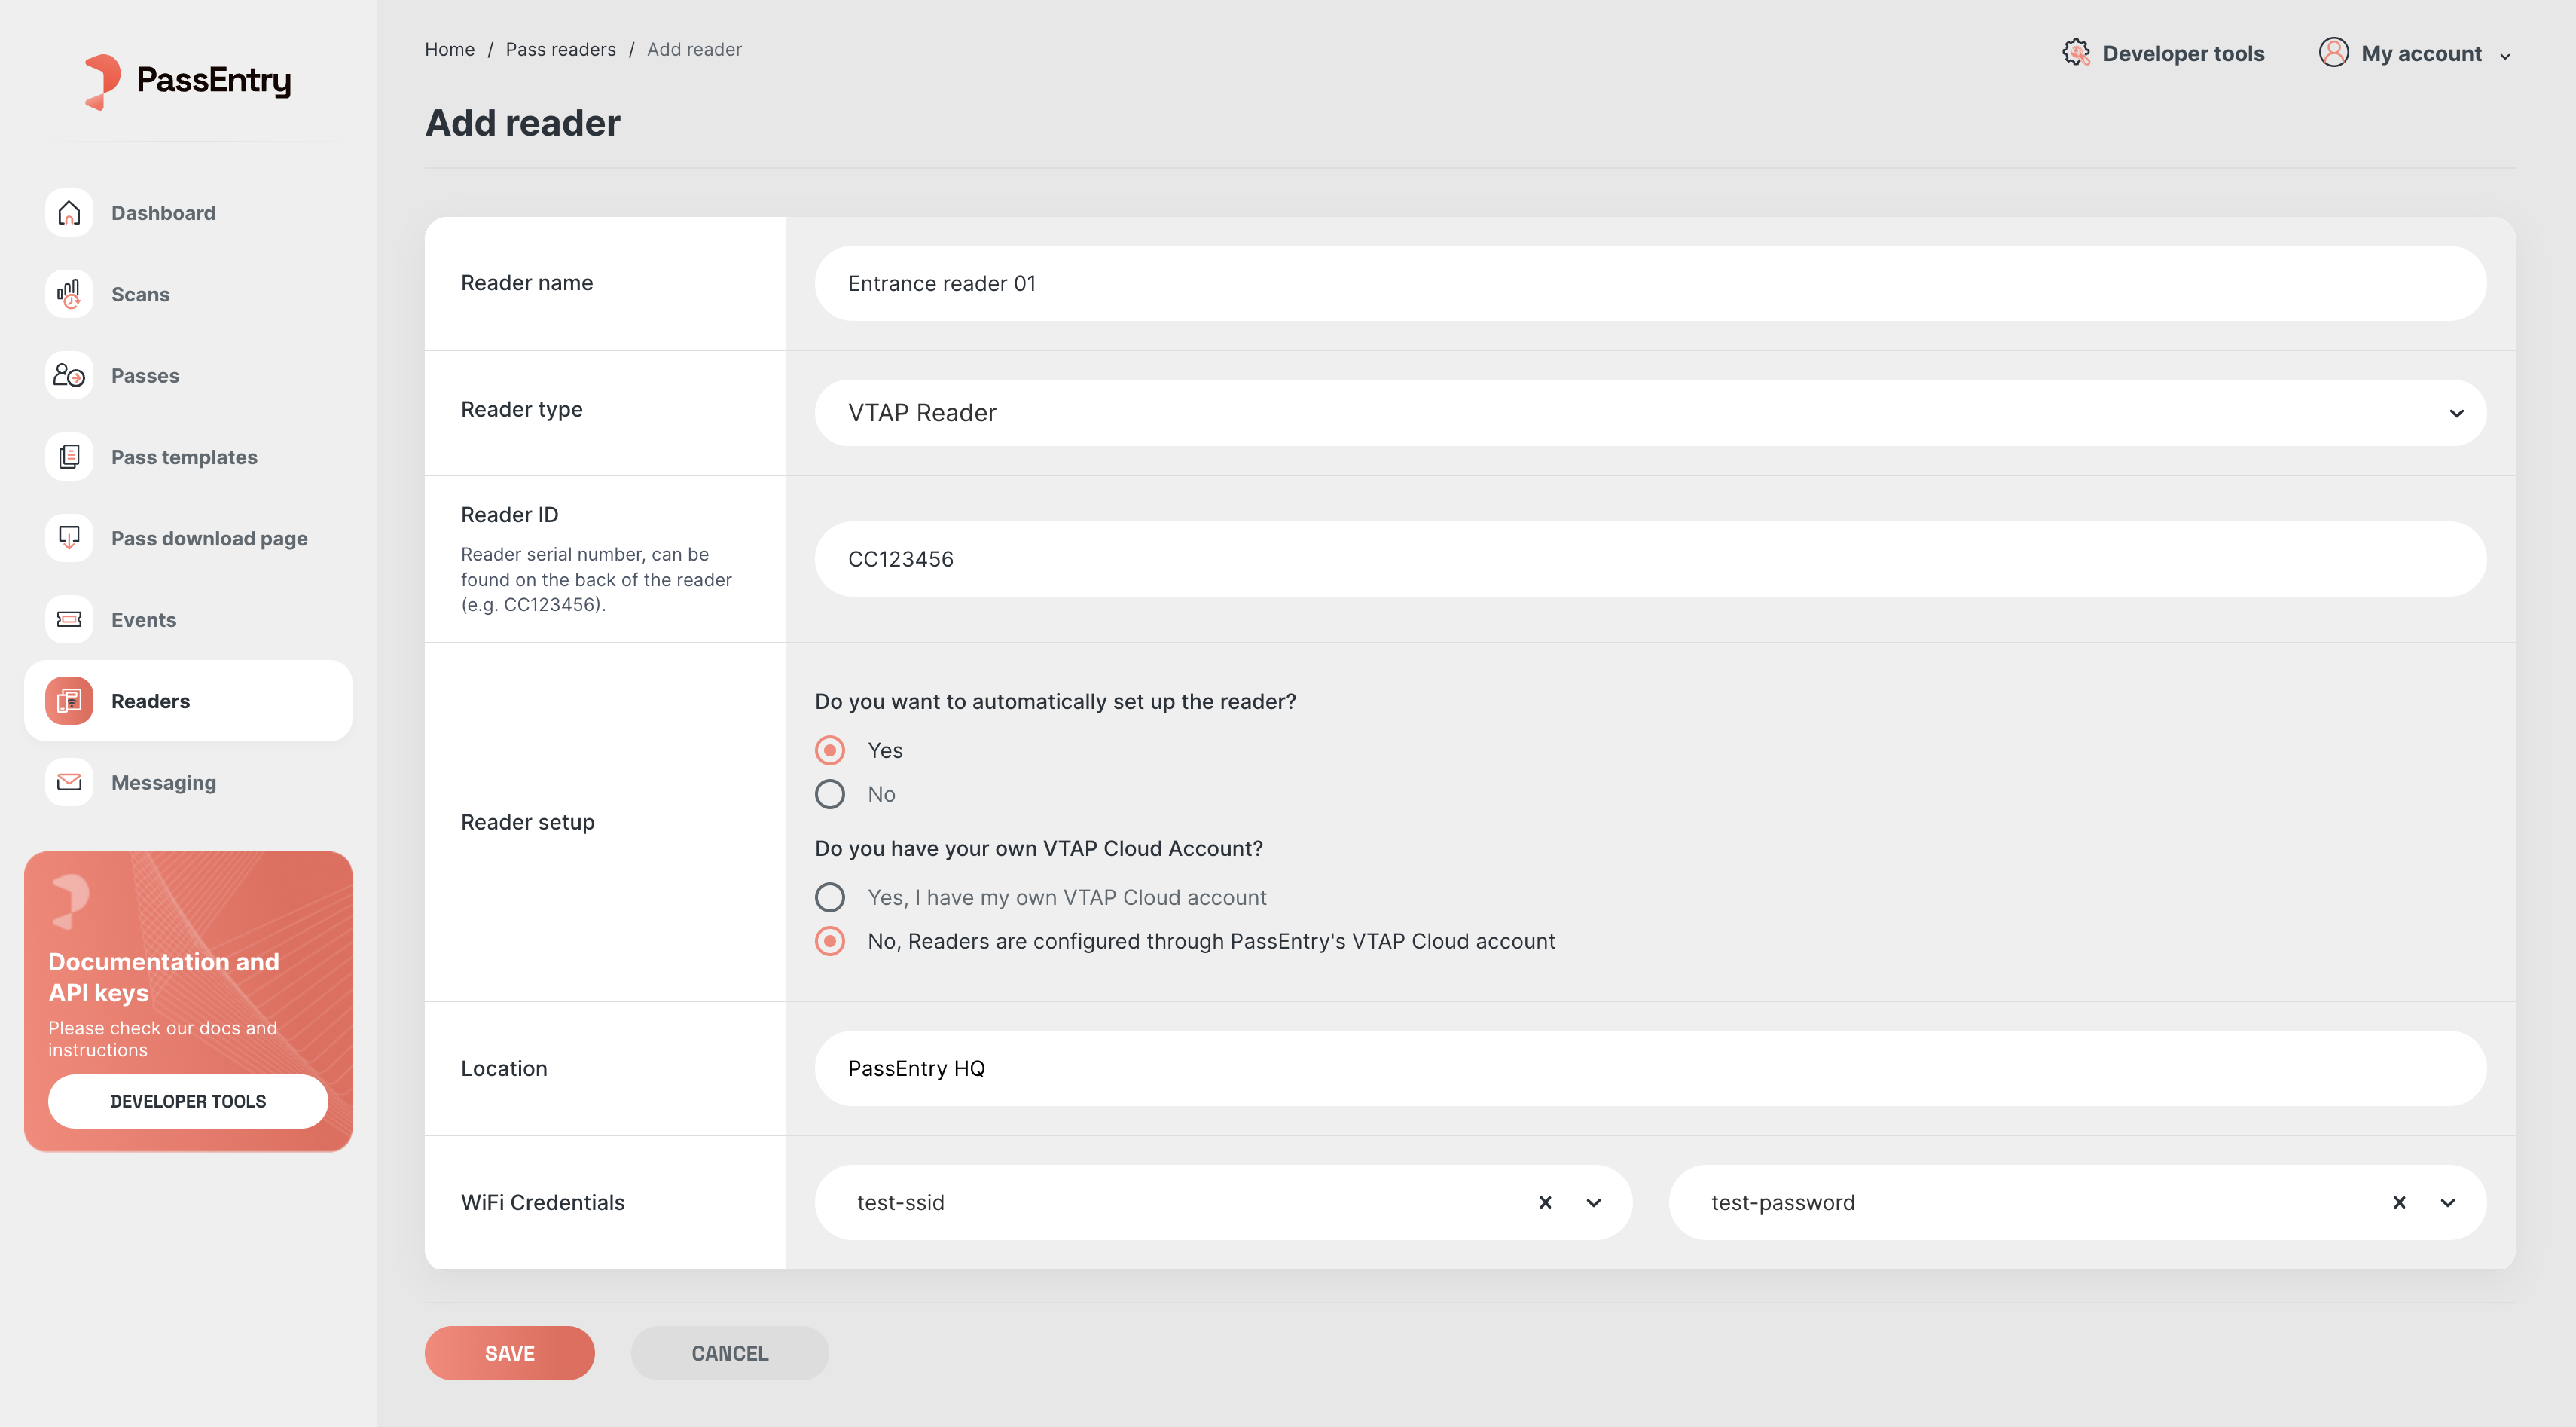
Fill in Reader Information
- Reader name: Choose a name to identify the reader (e.g.,
Entrance reader 01). - Reader type: Select VTAP Reader from the dropdown.
- Reader ID: Enter the reader’s serial number (printed on the back of the device, e.g.,
CC123456).
- Reader name: Choose a name to identify the reader (e.g.,
-
Select Reader Setup Options
- For automatic configuration, choose Yes under Do you want to automatically set up the reader?
- Under Do you have your own VTAP Cloud Account?, select:
- No if using PassEntry’s VTAP Cloud account, or
- Yes if you bought your readers independently and they are managed through your VTAP Cloud account.
- VTAP Cloud Account: If using your own VTAP Cloud account, enter the API key (please contact VTAP support to get the API key).
-
Set Location and Network
- Location: Provide a label for where the reader is physically located (e.g.,
PassEntry HQ). - WiFi Credentials: Enter the network SSID and password to connect the reader to WiFi.
- Location: Provide a label for where the reader is physically located (e.g.,
- Save Configuration. The reader will be automatically configured using the information provided.
After Setup
Once the reader is set up, you’ll see a “Completed” status in the Dashboard. After setup, you can manage the following directly from the PassEntry Dashboard:- Edit the reader’s name and location
- Update WiFi credentials
- Adjust validation settings